
Introduction
This guide explains how to configure your Gmail account to automatically forward all incoming emails to your Microsoft 365 mailbox.
Step 1: Sign in to Your Gmail Account
Open your web browser and sign in to your Gmail account using your credentials.
Step 2: Open Gmail Settings
Click the gear icon in the top right corner and select See all settings.

Step 3: Go to the Forwarding and POP/IMAP Tab
- In the settings menu, navigate to the Forwarding and POP/IMAP tab.
- Click on Add a forwarding address

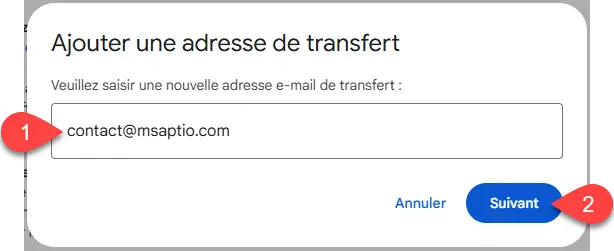
Step 4: Add a Forwarding Address
Enter your Microsoft 365 email address (e.g., john.doe@yourcompany.com) and click on next.
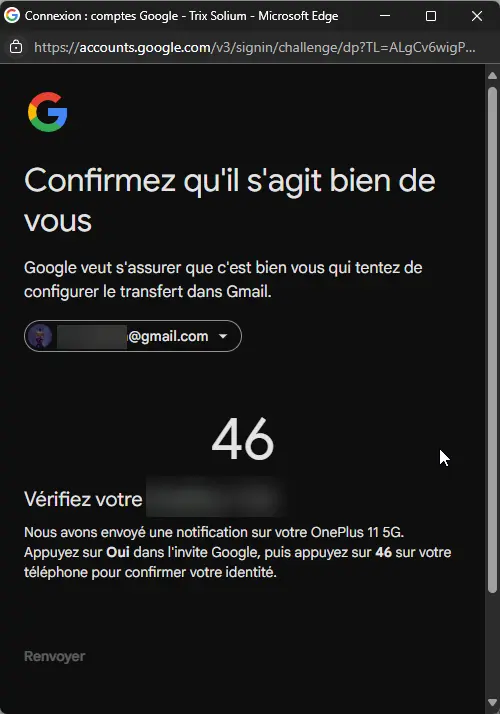
Step 5: Confirm with MFA (optional)
Gmail may optionally prompt you to confirm with an MFA prompt.
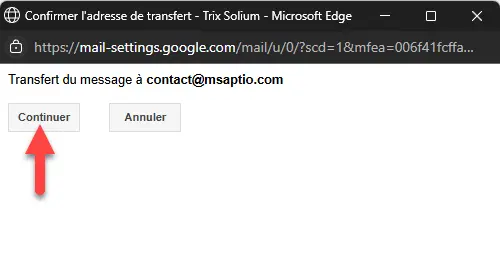
Step 6: Confirm the Forwarding Address
Gmail will prompt you to confirm the forwarding address. Click Proceed in the confirmation dialog, then click on Ok.

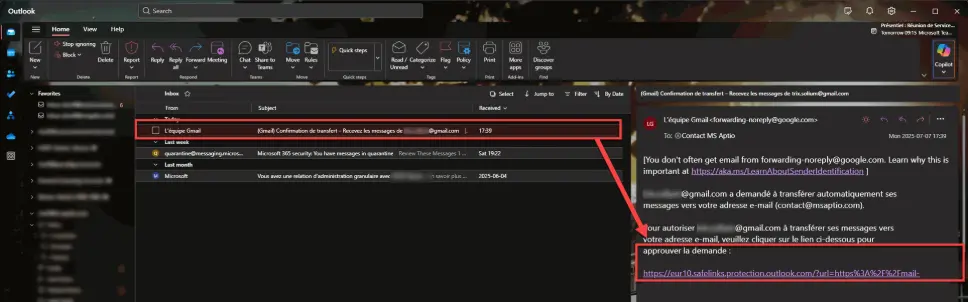
Step 7: Verification link Email
Gmail will send a verification link to your Microsoft 365 email inbox. Open Outlook or your Microsoft 365 mailbox and find the confirmation email, then click on the approval link.
Step 8: Confirm
On the new window, click on Confirm.


Step 9: Back to Forwarding and POP/IMAP Tab
After verification, go back in the Forwarding and POP/IMAP (see step 2 and 3 if required) and press F5 on your keyboard to refresh the page.
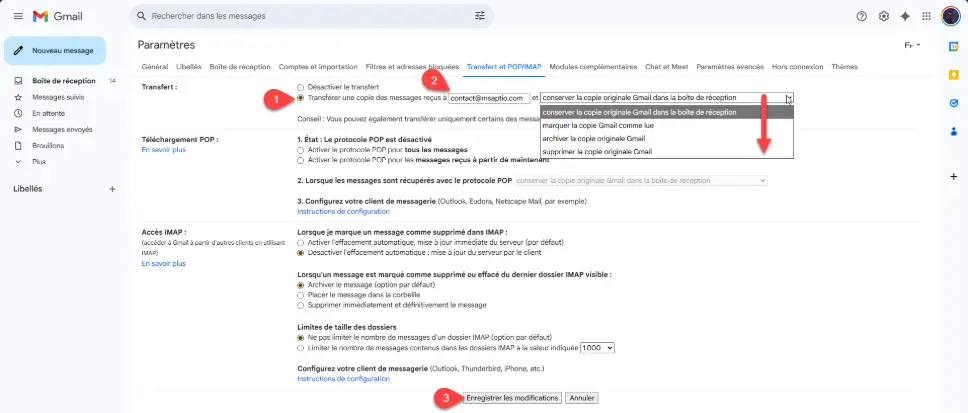
Step 10: Enable forwarding
After refresh, you should be able to
- Select Forward a copy of incoming mail to and enter your Microsoft 365 email address.
- Decide what to do with Gmail’s copy of the emails (e.g., keep Gmail’s copy in the inbox, archive it, or delete it). Select your preference from the drop-down - We recommend choosing keep Gmail’s copy in the inbox (first option).
- Scroll down and click Save Changes to apply the forwarding rule.
Your Gmail is now configured to automatically forward all incoming messages to your Microsoft 365 mailbox. You should see a red banner on top of your Gmail window that confirm mail forward is enabled.
